

A laboratory can contain dangerous chemicals, infectious materials, high-voltage equipment, and other hidden hazards. Fortunately, lab safety symbols help you recognize many of these dangers before you begin working. A simple picture on a chemical bottle or laboratory door can communicate an important warning within seconds.
However, recognizing a symbol is only the first step. You also need to understand what the warning means and how to respond safely. A flame symbol, for example, warns about fire-related hazards, while a corrosion pictogram identifies chemicals that can cause severe skin or eye burns.
Laboratory safety symbols appear on chemical containers, equipment, storage cabinets, laboratory entrances, and emergency facilities. They communicate potential hazards, required protective measures, prohibited actions, and the locations of important safety equipment.
This guide explains the most common lab safety signs and their meanings, including chemical, biological, radiation, fire, electrical, and emergency symbols. You’ll also learn how to interpret warning labels, use Safety Data Sheets (SDSs), and follow appropriate laboratory safety precautions.
What Are Lab Safety Symbols?
Lab safety symbols are visual signs or pictograms that communicate hazards, safety requirements, restrictions, and emergency information. They help students, researchers, technicians, and laboratory workers recognize potential dangers without relying entirely on written instructions.
These symbols appear in many forms. Some use black illustrations inside red diamond-shaped borders, while others use colored triangles, circular signs, or recognizable pictures displayed near equipment.
For example, a red-diamond flame pictogram on a chemical bottle identifies certain fire hazards. A biohazard symbol on a specimen container warns people about potentially hazardous biological material.
Although these signs serve a common safety purpose, they don’t all belong to the same classification system. The Globally Harmonized System (GHS) addresses chemical hazard communication, while workplace safety signs and specialized warnings cover other hazards.
Why Are Safety Symbols Important in a Laboratory?
Laboratories often contain several hazards in the same room. Clear warning signs help people identify risks before touching materials, operating equipment, or entering restricted areas.
Laboratory safety signs serve several important purposes:
- Hazard identification: They alert people to chemical, biological, electrical, radiation, and physical dangers.
- Accident prevention: They encourage appropriate precautions before potentially dangerous activities begin.
- Chemical handling: They help workers recognize hazardous substances and locate detailed handling instructions.
- Personal protection: Mandatory-action signs identify required protective equipment, such as safety goggles or protective gloves.
- Emergency preparedness: They help people locate eyewash stations, fire extinguishers, first aid supplies, and emergency exits.
- Contamination prevention: Biological warnings and hygiene signs help prevent the spread of hazardous materials.
- Restricted access: Warning signs identify areas that require authorization, specialized training, or additional protective measures.
A warning sign cannot eliminate a hazard by itself. Instead, it provides information that helps people make safer decisions.
Where Are Laboratory Safety Symbols Used?
You’ll find laboratory hazard symbols wherever people need information about a specific risk or safety requirement.
Common locations include:
- Chemical bottles, reagent containers, and chemical storage cabinets
- Laboratory doors and restricted work areas
- Biological specimen containers and designated research rooms
- Radiation-controlled areas and X-ray equipment
- Lasers, electrical panels, and specialized laboratory instruments
- Cryogenic storage equipment and low-temperature systems
- Fire extinguishers, fire alarms, and emergency exits
- Eyewash stations, safety showers, and first aid facilities
Signs should remain visible and understandable at the point where people need them. Specific placement requirements depend on the hazard, facility, and applicable safety standards.
What Is the Difference Between a Hazard Symbol and a Safety Sign?
Although people often use these terms interchangeably, hazard symbols and safety signs can communicate different types of information.
| Sign type | Main purpose | Example |
| Chemical hazard pictogram | Identifies a classified chemical hazard | Flame or corrosion pictogram |
| Biological warning | Identifies a biological hazard | Biohazard symbol |
| Radiation warning | Identifies a radiation-related hazard | Radiation trefoil |
| Mandatory-action sign | Tells people what protection they must use | Eye protection required |
| Prohibition sign | Shows that an activity is forbidden | No smoking |
| Emergency information sign | Identifies safety equipment or escape routes | Eyewash station or emergency exit |
| Equipment warning | Alerts people to a specific physical danger | High-voltage warning |
Understanding these differences makes laboratory safety symbols easier to interpret. It also prevents confusion between chemical-label pictograms and general workplace signs.
Lab Safety Symbols and Their Meanings
A quick-reference chart makes it easier to identify common laboratory safety symbols without reading a lengthy explanation for every sign.
The following table summarizes widely encountered symbols and warnings.
| Symbol or sign | Meaning | Recommended response |
| Flame | Certain flammable or fire-related chemical hazards | Control ignition sources and follow handling instructions |
| Flame over circle | Oxidizing substances | Follow required storage and handling precautions |
| Corrosion | Severe skin or eye damage, or corrosive effects on metals | Use specified protective equipment |
| Skull and crossbones | Certain acute toxicity hazards | Prevent exposure and follow chemical-specific precautions |
| Exclamation mark | Certain irritant or harmful effects | Read the hazard statements and follow precautions |
| Health hazard silhouette | Certain serious or chronic health hazards | Follow exposure controls and handling procedures |
| Exploding bomb | Certain explosive or unstable substances | Follow specialized handling and storage procedures |
| Gas cylinder | Gas under pressure | Secure and handle cylinders correctly |
| Environmental hazard | Certain hazards to aquatic environments | Prevent environmental release and follow disposal instructions |
| Biohazard | Potentially hazardous biological material | Follow applicable biosafety procedures |
| Radiation trefoil | Ionizing radiation hazard | Follow radiation-control procedures |
| High-voltage warning | Electrical shock or electrocution risk | Keep clear of dangerous electrical equipment |
| Laser warning | Potential injury from laser radiation | Follow laser-specific safety controls |
| Eye protection required | Protective eyewear is mandatory | Wear the specified eye protection |
| Eyewash station | Emergency eye-flushing equipment location | Know how to reach and operate the station |
| First aid | First aid resources or assistance | Follow the facility’s emergency procedures |
The chemical entries correspond to particular GHS pictograms or classifications where applicable. Other entries, such as high-voltage and eyewash signs, belong to different types of laboratory safety signage.
How to Use a Lab Safety Symbols Chart
A laboratory safety symbols chart works best when you treat it as a starting point rather than a complete safety manual.
When you encounter an unfamiliar sign, follow these steps:
- Identify the symbol and read any accompanying text.
- Determine which hazard or restriction the sign communicates.
- Check the relevant chemical label, Safety Data Sheet, or equipment instructions.
- Identify the required protective equipment and safety procedures.
- Ask a supervisor or laboratory safety officer when the meaning remains unclear.
Remember that one chemical may display several hazard pictograms. A substance might be flammable and harmful to health, for example. Reading only one symbol could leave you unaware of another important risk.
Types of Laboratory Safety Symbols
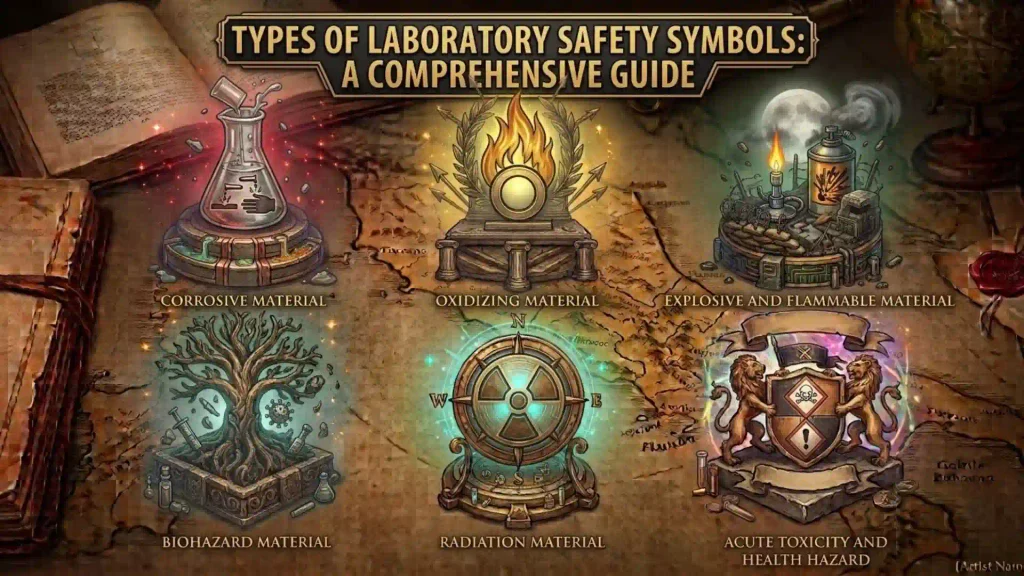
Laboratory signs cover several hazard categories. Understanding each group helps you recognize what a warning means and which precautions may be necessary.
Chemical Hazard Symbols
Chemical hazard symbols communicate risks associated with substances that can cause physical harm, health effects, or environmental damage.
Many chemical containers use pictograms from the Globally Harmonized System of Classification and Labelling of Chemicals (GHS). These pictograms have black symbols on white backgrounds with red diamond-shaped borders.
The symbol communicates a hazard classification. The accompanying label provides additional details about the substance and recommended precautions.
Here are the main GHS chemical pictograms.
Flammable Symbol
The flammable symbol shows a black flame inside a red diamond. It identifies certain chemicals that can ignite easily or present other specified fire-related hazards.
Examples may include qualifying solvents and other flammable liquids, gases, or solids.
Keep these substances away from ignition sources when required. Follow the product’s storage instructions and use appropriate ventilation and protective equipment.
Never assume every substance with a flame-related risk behaves identically. The exact precautions depend on its properties and classification.
Oxidizing Material Symbol
The oxidizer pictogram shows a flame over a circle. It identifies substances classified as oxidizers.
Oxidizing chemicals can intensify a fire or support combustion under specified conditions. Some may react dangerously when stored or handled with incompatible materials.
Follow the chemical’s storage instructions, separate incompatible substances as directed, and consult its SDS before handling it.
An oxidizer doesn’t necessarily burn in the same way as a flammable solvent. Its significance lies in how it can support or intensify combustion.
Corrosive Material Symbol
The corrosive material hazard symbol depicts liquid from test tubes damaging a hand and a metal surface.
Under the GHS, this pictogram can identify substances that cause severe skin burns, serious eye damage, or corrosion of metals.
Examples may include certain strong acids and bases.
Potential consequences include chemical burns, eye injuries, and damaged laboratory equipment. Appropriate precautions depend on the substance and task.
Wear the specified chemical-resistant gloves, eye protection, and protective clothing. Use designated handling facilities when required, and follow the laboratory’s procedures for spills and accidental contact.
Never choose gloves based on appearance alone. Different glove materials offer different levels of chemical resistance.
Toxic Material Symbol
The toxic material symbol shows a skull and crossbones. It identifies chemicals classified for certain forms of acute toxicity.
Exposure may cause serious poisoning or death, depending on the substance, dose, and route of exposure.
Toxic substances can enter the body through inhalation, ingestion, or skin contact, depending on their properties. Appropriate precautions may include enclosed handling, ventilation, exposure monitoring, and specialized protective equipment.
Read the hazard statements and Section 4 of the SDS for first-aid information. Follow the facility’s procedures if exposure occurs.
Do not attempt to identify an unknown substance by smelling or touching it.
Exclamation Mark Symbol
The GHS exclamation mark identifies certain harmful effects that may include skin or eye irritation, skin sensitization, respiratory tract irritation, or harmful acute toxicity.
The exact meaning depends on the chemical’s classification and accompanying hazard statements.
For example, a chemical may cause skin irritation without carrying the same classification as a substance that produces severe chemical burns.
Read the label carefully and follow the stated precautions. Don’t assume that the exclamation mark describes every possible health effect.
Health Hazard Symbol
The health hazard symbol shows a human silhouette with a starburst shape on the chest.
It identifies certain serious health hazards, which may include:
- Carcinogenicity
- Respiratory sensitization
- Germ cell mutagenicity
- Reproductive toxicity
- Specific target-organ toxicity
- Aspiration toxicity
These hazards differ from immediate irritation or acute poisoning. Some effects may develop after repeated exposure or involve particular exposure routes.
Follow the relevant exposure controls and handling procedures. Consult the SDS for the specific classification and precautions rather than relying on the image alone.
Explosive Material Symbol
The exploding bomb pictogram warns about certain explosive or unstable substances, including some self-reactive substances and organic peroxides.
Such materials may react dangerously under particular conditions involving heat, shock, friction, contamination, or other triggers, depending on the substance.
Only trained and authorized personnel should handle these materials under approved procedures. Follow specialized storage and handling requirements, and never experiment with unknown substances.
Gas Cylinder Symbol
The gas cylinder pictogram identifies gases under pressure. Depending on the gas and its condition, hazards may include pressure-related injuries, cold burns, or rupture if a container becomes heated.
Some gases also present additional hazards, such as flammability, toxicity, or oxygen displacement.
Secure cylinders correctly, use compatible regulators, and follow approved transport and storage procedures. Read all applicable labels because the gas-cylinder symbol does not describe every hazard associated with the contents.
Environmental Hazard Symbol
The environmental hazard pictogram shows a dead tree and fish. It identifies chemicals classified for certain hazards to the aquatic environment.
This pictogram is relevant to environmental protection and chemical disposal. It doesn’t replace workplace health and safety information.
Prevent spills from entering drains when required, and follow the facility’s waste-management procedures.
Important: OSHA’s Hazard Communication Standard requires eight GHS pictograms for covered chemical-labeling situations in the United States. The environmental pictogram is not mandatory under that standard because environmental hazards fall outside OSHA’s jurisdiction. Other jurisdictions may have different requirements.
Biological Safety Symbols
The biohazard symbol identifies biological hazards associated with certain infectious materials, contaminated specimens, or designated laboratory areas.
The familiar biohazard emblem uses three interlocking curved shapes around a central point. Laboratories may display it on specimen containers, biological waste containers, equipment, and doors.
Biological materials that may require special handling include:
- Specimens that could contain infectious agents
- Laboratory cultures containing microorganisms
- Materials contaminated during biological procedures
- Biological waste requiring designated disposal methods
The symbol doesn’t identify a specific organism or automatically establish the level of risk. Actual precautions depend on the biological agent, activity, exposure route, and containment procedures.
How to Respond to a Biohazard Warning
When you encounter a biological safety symbol, follow your laboratory’s approved biosafety procedures.
- Wear the required PPE.
- Use the designated containment equipment.
- Follow approved decontamination procedures.
- Dispose of biological waste in the correct containers.
- Avoid handling unfamiliar specimens without authorization.
- Report spills and potential exposures promptly.
The CDC and NIH publish Biosafety in Microbiological and Biomedical Laboratories (BMBL), a key source of US biosafety guidance. Its recommendations emphasize risk assessment and appropriate containment rather than relying on a symbol alone.
Radiation Hazard Symbols
Radiation hazard symbols warn people about radiation-related risks in designated areas, on equipment, or around radioactive materials.
The correct precautions depend on the type of radiation and the device or material involved. Ionizing radiation, laser light, ultraviolet radiation, and magnetic fields are not interchangeable hazards.
Ionizing Radiation Symbol
The familiar radiation warning symbol is a trefoil, usually displayed in magenta or black against a yellow background.
It identifies certain radiation hazards involving radioactive materials or radiation exposure.
Potential sources include X-ray equipment, gamma radiation, and radioactive substances used in scientific or medical applications.
Ionizing radiation can damage living tissue, depending on the dose, exposure conditions, and other factors. Laboratory personnel must follow approved radiation-safety procedures.
Common protective measures include:
- Following access restrictions and authorization requirements
- Using specified shielding and safety equipment
- Following approved procedures for handling radioactive materials
- Monitoring exposure when required
- Keeping unnecessary personnel away from controlled areas
Non-Ionizing Radiation Warnings
Non-ionizing radiation includes several types of electromagnetic radiation that don’t have enough photon energy to ionize atoms directly. However, this doesn’t mean every source is harmless.
Potential laboratory sources include ultraviolet lamps, intense optical sources, radiofrequency equipment, and microwave equipment.
Depending on the source, excessive exposure can cause eye injury, skin damage, or heating of tissue.
Read the sign and equipment instructions carefully. Use the prescribed shielding, guards, protective equipment, and access controls.
Laser Beam Hazard Symbol
Laser warnings identify equipment that can injure the eyes or skin. Certain direct or reflected laser beams can cause serious or permanent vision damage.
The risk depends on factors such as the laser’s wavelength, power, exposure duration, and operating conditions.
Follow the equipment’s classification and approved safety procedures. Never bypass an interlock or look directly into a laser beam.
Use laser protective eyewear specifically selected for the relevant equipment and wavelength when required. Ordinary safety glasses may not provide adequate protection.
Strong Magnetic Field Warning
Strong magnetic-field signs may appear around specialized equipment, including magnetic resonance imaging (MRI) systems and nuclear magnetic resonance (NMR) instruments.
These fields can create risks involving certain medical implants and ferromagnetic objects. The exact restrictions depend on the equipment and environment.
People with pacemakers, implanted devices, or other medical concerns should follow the site’s screening and access procedures.
Never treat every medical implant or metal object as identical. Consult the equipment-specific safety instructions and qualified personnel before entering a restricted area.
Fire Safety Symbols
Fire safety symbols help laboratory personnel recognize ignition hazards, identify fire protection equipment, and respond appropriately during emergencies.
Laboratories may contain flammable solvents, combustible materials, oxidizers, heating devices, and electrical equipment. Controlling these hazards requires more than recognizing a warning sign.
No Open Flames Sign
A no open flames sign prohibits flames within the designated area.
The restriction may protect against ignition of flammable vapors, gases, or other combustible materials.
Follow the sign even when a substance’s container appears closed. Flammable vapors may escape during handling, and other ignition risks may exist nearby.
Use only approved heating methods and equipment for the task.
Fire Extinguisher Sign
A fire extinguisher sign identifies the location of firefighting equipment.
Workers should know where extinguishers are located before an emergency occurs. They should also understand the facility’s fire response procedures and whether their training authorizes them to use an extinguisher.
Not every fire can be managed safely with a portable extinguisher. If the fire grows, the smoke threatens escape, or you lack the required training, follow the evacuation procedure and alert emergency responders.
Fire Alarm and Emergency Exit Signs
Fire alarm signs identify how to activate the facility’s warning system. Emergency exit signs mark designated escape routes.
Keep exits and access routes clear. During an evacuation, follow posted directions and move to the designated assembly area.
Never delay evacuation to collect personal belongings or attempt an unfamiliar rescue.
Oxidizer and Fire Hazard Warnings
An oxidizing-material pictogram warns about substances that can intensify combustion. A flammable pictogram identifies other specified fire-related chemical hazards.
These signs communicate different chemical properties, so they require different handling precautions.
Follow the storage and compatibility instructions for each substance. Keep materials away from ignition sources when required, and never assume that two chemicals can share a storage area simply because both are liquids.
Physical and Electrical Hazard Symbols
Physical safety symbols identify hazards arising from equipment, temperature, pressure, and other physical conditions.
The exact signs in a laboratory depend on the instruments and work being performed.
High-Voltage Symbol
A high-voltage warning often uses a lightning bolt inside a yellow triangular sign or another approved electrical hazard design.
It warns about the risk of electrical shock, burns, or electrocution.
Keep away from exposed electrical hazards and report damaged equipment. Never open electrical panels or repair energized equipment unless you’re authorized and qualified to perform the work.
Low-Temperature and Cryogenic Warnings
Low-temperature signs identify equipment, surfaces, or materials that can cause cold injuries.
Cryogenic materials, including liquid nitrogen, can cause severe cold burns and frostbite. Some cryogenic liquids also expand significantly as they warm and evaporate, creating pressure or oxygen-displacement hazards under certain conditions.
Use the protective equipment and approved handling methods specified for the task. Ensure appropriate ventilation and follow procedures for cryogenic storage and transport.
Never place cryogenic liquids inside sealed containers unless the equipment is specifically designed for that purpose.
Hot-Surface Warning
Hot-surface signs identify equipment or surfaces that can cause thermal burns.
Examples include heating plates, ovens, furnaces, and recently heated laboratory glassware.
Use suitable heat-resistant protection when required, and allow equipment to cool according to approved procedures. Remember that a surface may remain dangerously hot even after the heating source has been switched off.
Compressed Gas and Pressure Hazards
Compressed gas cylinders and pressurized systems can create mechanical hazards if mishandled.
Secure cylinders as required, use appropriate fittings and regulators, and keep valve protection in place during transport when specified.
Follow the approved procedure for gas leaks or damaged cylinders. Don’t attempt repairs when you’re not trained and authorized to do so.
Mandatory Laboratory Safety Signs
Mandatory signs tell people which protective measures they must take in a particular area.
Common laboratory PPE symbols include:
- Eye protection required: Wear the designated protective eyewear.
- Gloves required: Use gloves suitable for the task and hazard.
- Protective clothing required: Wear the specified coat, gown, or other protective garment.
- Respiratory protection required: Use the prescribed respiratory equipment under the applicable program.
- Face protection required: Use the specified face shield or other appropriate protection.
These signs don’t mean that the same equipment works for every hazard.
For example, ordinary disposable gloves may not protect against every chemical. Respirators also require appropriate selection, training, and other safeguards.
Check the laboratory’s risk assessment and operating procedure to determine the correct equipment.
Prohibition Signs in Laboratories
Laboratory prohibition signs identify activities or behaviors that are not allowed in a specific location.
Common examples include no smoking, no open flames, no unauthorized entry, and no food or drink.
Food and Drink Prohibited
Food and drink restrictions help prevent accidental ingestion of hazardous substances and reduce contamination.
Never eat, drink, or store food in an area designated for laboratory work involving hazardous materials. Keep laboratory equipment separate from items intended for food preparation or consumption.
Wash your hands according to the laboratory’s hygiene procedures before leaving the work area.
No Unauthorized Entry
Restricted-access signs warn visitors and untrained personnel to stay out of designated areas.
These areas may contain infectious materials, radioactive sources, powerful magnetic fields, lasers, or other hazards requiring specialized controls.
Enter only when authorized and after meeting the required training and protective-equipment conditions.
No Pacemakers or Metallic Implants
Some specialized areas display warnings for pacemakers or other medical implants because of strong magnetic fields or equipment-specific risks.
Follow the posted restrictions and required screening procedures. Anyone with a relevant medical implant should consult qualified site personnel before entering.
These warnings should be applied according to the actual hazard rather than assumed to be necessary in every laboratory.
Emergency Equipment and First Aid Signs
Laboratory emergency safety signs help people locate critical resources during an incident.
Common examples include emergency eyewash stations, safety showers, first aid kits, fire extinguishers, alarms, and emergency exits.
Eyewash Station Symbol
An eyewash station sign identifies equipment used to flush the eyes following certain exposures.
Know its location before you begin an activity involving hazardous chemicals or other potential eye hazards. Understand the facility’s emergency procedures and how to operate the equipment.
If a hazardous substance enters the eyes, follow the product’s first-aid instructions and the laboratory’s emergency procedure immediately. Don’t delay to search for a sign after an exposure occurs.
Safety Shower Sign
A safety shower sign identifies equipment intended for certain emergency body-flushing situations.
Know where the shower is located and keep access unobstructed. Follow the facility’s training on when and how to use it.
First Aid and Emergency Exit Signs
First aid signs identify first aid resources or designated assistance points. Emergency exit signs identify routes to leave the building or affected area.
Before starting laboratory work, familiarize yourself with these locations and learn whom to contact during an emergency.
How to Read and Interpret Laboratory Warning Symbols
Recognizing a sign is important, but correct interpretation matters just as much.
Understand the Shape, Color, and Pictogram
Many safety signs use standardized combinations of colors and shapes. These features help people recognize whether a sign communicates a warning, prohibition, mandatory action, or emergency information.
GHS chemical pictograms use a red diamond-shaped border with a black symbol on a white background. Many general warning signs use other shapes and color combinations.
However, never rely on color alone. Read accompanying text and consider the location, equipment, and activity involved.
International standards such as ISO 7010 cover registered safety signs. Their use depends on the applicable standards and regulations.
Read Chemical Labels Beyond the Symbol
A chemical label contains more information than its pictogram.
Important elements may include:
- Product identifier: Identifies the chemical or mixture.
- Signal word: Uses Danger or Warning to indicate the relative severity of a classified hazard.
- Hazard statements: Describe the nature of the hazard.
- Precautionary statements: Recommend ways to prevent or reduce harm.
- Pictograms: Provide a visual summary of specified hazards.
- Supplier information: Identifies the responsible supplier where required.
For example, a corrosion pictogram tells you that the product has a relevant corrosive hazard classification. The accompanying statements provide the exact warnings and precautions.
Read the complete label before use. Don’t assume that two chemicals displaying the same pictogram have identical properties or require identical protective equipment.
Check the Safety Data Sheet Before Handling a Chemical
A Safety Data Sheet (SDS) provides detailed information about a chemical’s hazards and safe use.
It complements the label by describing emergency measures, handling requirements, storage considerations, exposure controls, and other safety information.
Several SDS sections are especially useful:
| SDS section | Information provided |
| Section 2: Hazard identification | Hazard classifications, pictograms, and label elements |
| Section 4: First-aid measures | Recommended initial response following exposure |
| Section 5: Firefighting measures | Fire-related hazards and firefighting guidance |
| Section 6: Accidental release measures | Spill and release precautions |
| Section 7: Handling and storage | Safe handling and storage recommendations |
| Section 8: Exposure controls and personal protection | Exposure limits, engineering controls, and PPE |
| Section 10: Stability and reactivity | Stability, reactivity, and incompatible materials |
| Section 13: Disposal considerations | Disposal information, where provided |
The SDS should match the product you’re using. If a chemical’s identity or labeling is unclear, stop and ask the responsible supervisor before handling it.
What Should You Do When You See an Unfamiliar Warning Sign?
Never guess when a sign could indicate a serious hazard.
Use this simple process:
- Stop before entering the restricted area or starting the task.
- Read the complete warning and any accompanying instructions.
- Identify the hazard and required restrictions.
- Check the relevant chemical label, SDS, or equipment procedure.
- Ask the laboratory supervisor or safety officer if anything remains unclear.
- Proceed only when you understand and can follow the required precautions.
This approach is especially important around radiation equipment, biological materials, highly toxic chemicals, and energized electrical systems.
Laboratory Safety Precautions for Common Hazards
Laboratory safety precautions turn hazard information into safer everyday behavior. Although each activity requires task-specific controls, several general practices apply across many laboratory environments.
Chemical Handling and Exposure Prevention
Safe chemical handling starts before you open a container.
- Read the chemical label and relevant SDS.
- Confirm that the substance is correctly identified.
- Use required engineering controls, such as a suitable fume hood.
- Wear protective equipment selected for the specific hazard.
- Store chemicals according to compatibility and manufacturer instructions.
- Keep incompatible materials separated as required.
- Follow approved spill-response and waste-disposal procedures.
Never use an unlabeled substance or return unused chemicals to a stock container unless the procedure specifically permits it.
Preventing Biological Contamination
Biological safety depends on the material, the procedure, and the laboratory’s risk assessment.
Follow approved containment methods, wear required protective equipment, disinfect work surfaces as directed, and dispose of biological waste correctly.
Never handle unfamiliar specimens or biological cultures without the appropriate training and authorization.
Report spills, accidental exposures, and damaged containment equipment promptly.
Electrical, Laser, and Radiation Safety
Laboratory instruments may generate hazards that cannot be fully understood from a general warning sign.
Follow access restrictions and operating instructions. Use approved shielding and protective equipment when required, and never bypass safeguards.
Only trained and authorized personnel should perform specialized work involving energized equipment, radiation sources, or hazardous laser systems.
Fire Prevention and Emergency Response
Good fire prevention begins with controlling ignition sources and storing materials correctly.
Keep flammable substances away from ignition sources when required. Maintain access to exits and emergency equipment, and report unsafe conditions.
If a fire, significant spill, or other emergency occurs, follow the facility’s emergency plan. Evacuate when directed and alert emergency responders.
Don’t attempt to manage a dangerous incident if doing so would put you or others at risk.
Personal Protective Equipment and Laboratory Hygiene
Personal Protective Equipment (PPE) can reduce exposure when the equipment matches the hazard and workers use it correctly.
Depending on the task, PPE may include safety goggles, protective gloves, lab coats, face shields, or specialized respiratory equipment.
Good laboratory hygiene also matters:
- Wash your hands according to the laboratory’s procedure.
- Keep food and drink away from designated laboratory areas.
- Remove contaminated PPE safely.
- Clean and maintain reusable protective equipment as instructed.
- Avoid carrying contamination into offices, hallways, or other clean areas.
PPE doesn’t replace proper ventilation, engineering controls, safe work practices, or training.
Laboratory Safety Rules, Training, and Standards
Several established systems and organizations help laboratories communicate hazards and manage risks.
Understanding their roles makes it easier to interpret signs without treating every symbol as part of one universal system.
Globally Harmonized System (GHS) Chemical Pictograms
The Globally Harmonized System of Classification and Labelling of Chemicals provides a framework for classifying chemical hazards and communicating them through labels and Safety Data Sheets.
Its chemical pictograms cover particular health and physical hazards. The GHS also includes an environmental hazard pictogram.
National systems adopt and implement GHS requirements differently. Therefore, the exact legal obligations can vary by jurisdiction.
OSHA Laboratory Safety Requirements
The US Occupational Safety and Health Administration (OSHA) establishes workplace safety requirements within its jurisdiction.
OSHA’s Laboratory Standard, 29 CFR 1910.1450, addresses occupational exposure to hazardous chemicals in covered laboratory workplaces.
Where the standard applies, employers must develop and implement a written Chemical Hygiene Plan with procedures, protective measures, and training provisions.
Remember that legal requirements depend on the work, workplace, and applicable jurisdiction. Not every school or research facility is subject to precisely the same rules.
NFPA 704 Hazard Identification System
The NFPA 704 hazard identification system uses a diamond divided into four colored sections.
It serves a different purpose from GHS chemical pictograms and is often used to communicate hazard information for emergency response.
| Diamond section | General meaning |
| Blue | Health hazard |
| Red | Flammability |
| Yellow | Instability |
| White | Special hazard information |
The blue, red, and yellow sections use numerical ratings to indicate degrees of hazard under NFPA 704 criteria. Generally, a higher number indicates a more serious hazard within that rating system.
The ratings are not interchangeable with GHS hazard categories. Never transfer numbers from one system to another without consulting the correct criteria.
Laboratory Biosafety Guidance From CDC and NIH
The Centers for Disease Control and Prevention (CDC) and the National Institutes of Health (NIH) publish important laboratory biosafety guidance.
Their Biosafety in Microbiological and Biomedical Laboratories publication describes risk assessment, containment, and recommended practices for biomedical and clinical laboratories.
This guidance is advisory rather than a universal regulatory code. Its recommendations must be applied to the actual biological materials, procedures, and risks involved.
ISO Safety Signs and International Standards
The International Organization for Standardization (ISO) develops standards that support consistent signs and graphical symbols.
ISO 7010 addresses registered safety signs used to communicate information about hazards, required actions, fire protection, and emergency escape.
However, a sign’s design, placement, and legal status depend on the applicable standards and local requirements.
How to Learn and Remember Lab Safety Symbols
Learning science lab safety symbols becomes easier when you connect each picture with the hazard and the action it requires.
Group Symbols by Hazard Type
Instead of memorizing a long list, study related symbols together.
- Chemical hazards: Flame, corrosion, skull and crossbones, and other GHS pictograms.
- Biological hazards: Biohazard warnings and biological containment signs.
- Radiation hazards: Ionizing radiation, laser, and other specialized warnings.
- Physical hazards: High voltage, hot surfaces, and low-temperature equipment.
- Mandatory actions: Eye protection, protective gloves, and other PPE requirements.
- Emergency information: Eyewash stations, safety showers, first aid, and emergency exits.
This method makes the symbols easier to compare and remember.
Use a Laboratory Safety Symbols Chart
A useful chart should include the actual symbol, its name, its meaning, and the main precaution.
Keep the chart easy to read and use accurate illustrations. Avoid substituting decorative images for official or facility-approved signs.
A printed chart can support laboratory safety education, but it cannot replace training or the specific procedures for a chemical or piece of equipment.
Practice With Realistic Laboratory Examples
Practical examples help you apply what you’ve learned.
Scenario: A chemical bottle displays the corrosion pictogram.
You should read the label and SDS, identify the relevant hazards, and use the required protective measures.
Scenario: A laboratory door displays a radiation warning.
Don’t enter until you understand the access requirements and have the necessary authorization and training.
Scenario: A specimen container carries a biohazard label.
Follow the relevant biosafety procedure and use the required containment and protective equipment.
Scenario: A laboratory entrance requires eye protection.
Wear the specified protective eyewear before entering the designated area.
Scenario: You discover a damaged electrical cable beside a high-voltage warning.
Keep away from the equipment and report the problem to authorized personnel. Don’t attempt an unqualified repair.
These examples illustrate the central lesson: recognizing a symbol should lead to the correct safety action.
Frequently Asked Questions About Lab Safety Symbols
What Are Lab Safety Symbols Used For?
Lab safety symbols communicate hazards, precautions, restrictions, and emergency information. They help laboratory workers and students recognize risks before handling chemicals, using equipment, or entering designated areas.
What Are the Most Common Lab Safety Symbols?
Common examples include the flammable, corrosive, toxic, health hazard, oxidizer, biohazard, radiation, high-voltage, and laser warnings. Mandatory eye protection signs and emergency equipment signs are also widely used.
The exact signs in a laboratory depend on the materials, equipment, activities, and applicable requirements.
What Does the Biohazard Symbol Mean?
The biohazard symbol warns people about certain potentially hazardous biological materials or designated areas. It may appear on specimen containers, biological waste containers, laboratory equipment, or doors.
The symbol doesn’t identify a specific organism or determine the risk level by itself. Follow the laboratory’s approved biosafety procedures.
What Does the Corrosive Chemical Symbol Mean?
The GHS corrosion pictogram shows liquid damaging a hand and a metal surface. It identifies chemicals classified for hazards such as severe skin burns, serious eye damage, or corrosion of metals.
Check the chemical label and SDS to determine the specific hazard and required precautions.
What Is the Difference Between GHS and NFPA 704 Symbols?
GHS pictograms communicate classified chemical hazards through red-diamond labels and accompanying hazard information. The NFPA 704 diamond uses blue, red, yellow, and white sections to communicate health, flammability, instability, and special hazard information.
The systems have different purposes. Their ratings and categories should not be treated as interchangeable.
Where Should Laboratory Safety Signs Be Displayed?
Signs should appear where people need hazard information to make safe decisions. Typical locations include laboratory entrances, chemical storage areas, hazardous equipment, controlled radiation areas, and emergency equipment locations.
Specific placement requirements depend on the sign type, hazard, and applicable regulations or standards.
Conclusion
Lab safety symbols help students, researchers, and laboratory workers recognize hazards before an accident occurs. They communicate important information about chemicals, biological materials, radiation, fire, electrical equipment, and emergency resources.
However, recognizing a symbol is only the beginning. You must also understand the warning, read relevant labels, consult Safety Data Sheets, and follow the correct laboratory safety procedures.
Learn the signs in your workplace before starting a task. Know where emergency equipment is located, wear the required protective equipment, and ask for help when a warning is unclear.
The safest laboratory decisions begin with recognizing the hazard and understanding what to do next.

Elliot Kensington
Elliot Kensington is a storyteller at heart, always fascinated by the hidden corners of human imagination. From a young age, he found comfort in books and the worlds they created, inspiring him to craft tales that blend emotion, suspense, and wonder. His writing journey began with short stories that captured fleeting moments of life, and over time, evolved into novels that explore both the extraordinary and the everyday. Elliot believes that every story holds a piece of the soul, and his mission is to connect readers to those moments that linger long after the last page. When he’s not writing, he enjoys exploring nature, capturing moments through photography, and seeking inspiration in the little things.
Books by Elliot Kensington:
-
Shadows of Tomorrow
-
The Whispering Path