
Welcome to the fascinating world of cultured foods. If you have ever been curious about creating your own bubbly beverages or spicy, tangy side dishes, you are in the right place. Delving into Fermentation 101: Making Kombucha and Kimchi at Home opens up a whole new realm of culinary possibilities. Not only do these traditional practices yield incredible flavors, but they also provide fantastic benefits for your gut microbiome. For thousands of years, humans have relied on the power of microbes to preserve harvests and enhance the nutritional profile of their meals before the invention of modern refrigeration. Today, we embrace these age-old techniques primarily for the vibrant, complex tastes and the undeniable health perks they bring to our daily diets. It might seem intimidating to leave food sitting on your counter on purpose, but the science behind it is safe, proven, and surprisingly straightforward. The good bacteria do all the heavy lifting, creating acidic environments where harmful pathogens simply cannot survive. By understanding a few core principles, anyone can transform simple ingredients like cabbage, tea, and sugar into gourmet staples. Let us dive into the methods, the magic, and the straightforward steps you need to master your first batches of these two iconic fermented creations.
The Basics of Fermentation
Before diving into specific recipes, it is essential to understand what is actually happening in those jars. Fermentation is a metabolic process where microorganisms like bacteria and yeast convert carbohydrates, such as sugars and starches, into alcohol or acids. These organic acids act as natural preservatives and give fermented foods their distinctively tart and tangy flavors. When making kimchi, we rely on lacto-fermentation. This process utilizes Lactobacillus bacteria, which are naturally present on the surface of all plants, especially cabbage and root vegetables. When you submerge these vegetables in a salty brine, you create an anaerobic (oxygen-free) environment that kills off bad bacteria while allowing the salt-tolerant Lactobacillus to thrive and produce lactic acid. Kombucha, on the other hand, relies on an aerobic (oxygen-rich) process driven by a SCOBY, which stands for Symbiotic Culture of Bacteria and Yeast. The yeast consumes the sugar in sweet tea and converts it into ethanol, and the bacteria then consume that ethanol and turn it into acetic acid, giving kombucha its signature vinegar-like bite. Understanding these distinct environments—anaerobic for vegetables, aerobic for kombucha—is the key to ensuring your projects succeed without spoiling. Cleanliness is your best friend throughout this process, as you want to foster the right microbes while keeping stray molds out of your kitchen laboratory.
Brewing Your First Batch of Kombucha
Creating a fizzy, refreshing batch of kombucha is easier than you might think, though it does require a bit of patience. You will need a large glass jar, a breathable cloth cover, filtered water, plain black or green tea, regular white sugar, and a SCOBY with some starter liquid. Begin by boiling four cups of water and steeping four to six tea bags for about fifteen minutes. Remove the tea bags and stir in one cup of white sugar until it is completely dissolved. Pour this concentrated sweet tea into your large glass brewing jar and add enough cold, filtered water to bring the total volume to about one gallon. It is absolutely crucial to let this mixture cool to room temperature; if the liquid is too hot, it will kill your SCOBY. Once the tea is comfortably cool, gently slide your SCOBY and the starter liquid into the jar. Cover the top with a tight-weave cloth or coffee filter, securing it with a rubber band to keep fruit flies at bay. Place the jar in a warm, dark spot in your kitchen where it will not be disturbed. This initial stage is called the first fermentation. Over the next seven to fourteen days, the SCOBY will consume the sugar. Start tasting it around day seven using a clean straw. When it reaches the perfect balance of sweet and tart for your palate, it is time for the second fermentation. Remove the SCOBY and two cups of the liquid to start your next batch. Pour the remaining kombucha into swing-top glass bottles, adding fruit juice, fresh ginger, or fruit puree for flavor. Seal the bottles tightly and leave them at room temperature for another two to three days to build carbonation. Finally, move the bottles to the refrigerator to chill and halt the process before enjoying your homemade beverage.
Crafting Authentic Homemade Kimchi
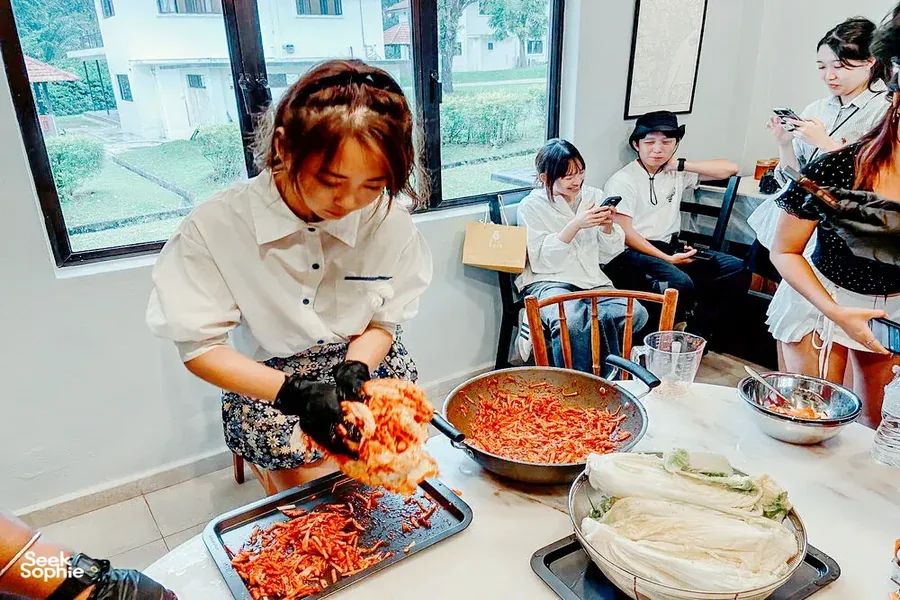
Making kimchi is a deeply sensory experience that involves chopping, salting, and hand-mixing vibrant ingredients. You will need a medium head of Napa cabbage, coarse sea salt, garlic, ginger, daikon radish, scallions, fish sauce (or soy sauce for a vegan version), and Korean red pepper flakes known as gochugaru. Begin by cutting the cabbage lengthwise into quarters and removing the tough core. Chop the leaves into bite-sized pieces and place them in a large bowl. Massage about half a cup of coarse salt into the cabbage leaves, ensuring every piece is coated. Pour enough water over the cabbage to just cover it, weigh it down with a heavy plate, and let it sit for two hours to draw out the moisture. While the cabbage softens, you can prepare the spicy paste. In a food processor, blend a head of peeled garlic, an inch of fresh ginger, a small onion, and a quarter cup of fish sauce until smooth. Stir in half a cup of gochugaru; this specific pepper flake is essential, as standard chili flakes will be far too spicy and lack the signature smoky sweetness. Once the cabbage has rested and shrunk in size, rinse it thoroughly under cold water three times to remove the excess salt, then drain it exceptionally well. Mix the drained cabbage with your prepared spice paste, along with matchstick-cut daikon radish and chopped scallions. Use your hands, preferably gloved to avoid chili burns, to massage the paste deeply into the vegetables. Pack the mixture tightly into a large, clean glass jar, pressing down firmly to force out air pockets and draw the liquid to the top. Leave about an inch of headspace at the top of the jar. Seal the jar and let it sit at room temperature for one to five days. Check it daily, pressing down on the vegetables to keep them submerged in their own brine. Once it smells pleasantly sour and bubbles appear when pressed, move the jar to the refrigerator, where it will continue to slowly develop deeper flavors over several weeks.
Tips for Safe and Successful Fermenting
The golden rule of any home culturing practice is keeping your equipment pristine. Wash all jars, utensils, and your hands with hot, soapy water, and make sure everything is completely rinsed of soap residue, as detergents can harm the beneficial bacteria. Always use filtered or spring water instead of straight tap water, because the chlorine and chloramines in municipal water supplies are designed to kill bacteria—exactly what you are trying to cultivate. Temperature plays a massive role in how quickly your foods culture; warmer kitchens will yield faster results, while cooler environments slow things down. Do not be afraid to trust your senses during the process. Your ferments should always smell tangy, acidic, and fresh, never like rotting garbage or mold. If you see white, fuzzy spots, or mold of any vibrant colors like green or black on the surface of your cabbage or SCOBY, you must throw the entire batch away and sanitize your equipment. However, a thin, white, wrinkly film on vegetables, known as Kahm yeast, is harmless, though it can negatively impact the flavor if left unchecked.
FAQs
What is the best temperature for brewing kombucha? Room temperature, ideally between 68 and 78 degrees Fahrenheit, is perfect for brewing kombucha.
Can I use regular table salt for making kimchi? It is best to use coarse sea salt or kosher salt, as the iodine and anti-caking agents in table salt can inhibit the good bacteria.
How do I know if my fermentation has gone bad? If you see fuzzy mold of any color or if the ferment smells like rotting garbage instead of pleasantly sour, you should throw it away.
Do I need special equipment to start fermenting? No special equipment is required, as standard glass jars and basic kitchen utensils are entirely sufficient for beginners.
How long will homemade kimchi last in the refrigerator? When stored properly in a sealed container, homemade kimchi can last for several months while its flavor continues to develop and deepen.
Final Thought
Mastering the art of culturing your own food is a rewarding blend of science and patience. As you become more comfortable with these traditional techniques, you will find yourself experimenting with unique flavor combinations and seasonal ingredients. Remember that the journey is just as enjoyable as the delicious results waiting for you at the end.
